If you can afford a proper manufactured mount that fits your needs,
buy it.
I suspect it will be less hassle than my home-made monstrosity.
I acquired a Dell 2300MP projector in late 2004.
I decided I wanted to mount it to the ceiling. I also decided that I was too impatient and cheap to buy a proper projector mount and wait for it to be delivered. Consequently I headed to Home Depot and bought $13 worth of metal. The largest expense was the piece of slotted angle iron.
The slots on the angle iron I bought couldn't fit anything bigger than 5/16". For the center mounting hole of the Dell 2300MP I bought a 1/4" x 1.5" machine bolt. The threads were fairly coarse. You don't want it TOO short or you will not be able to fit all the nuts and washers. If you are bold, like me, you can just bring your projector into the store and try bolts till you find the right one. It's not like Home Depot sells 2300MPs.
One more invaluable piece of equipment is a friend with a metal saw (and a file to take all the flesh-shredding burrs off).
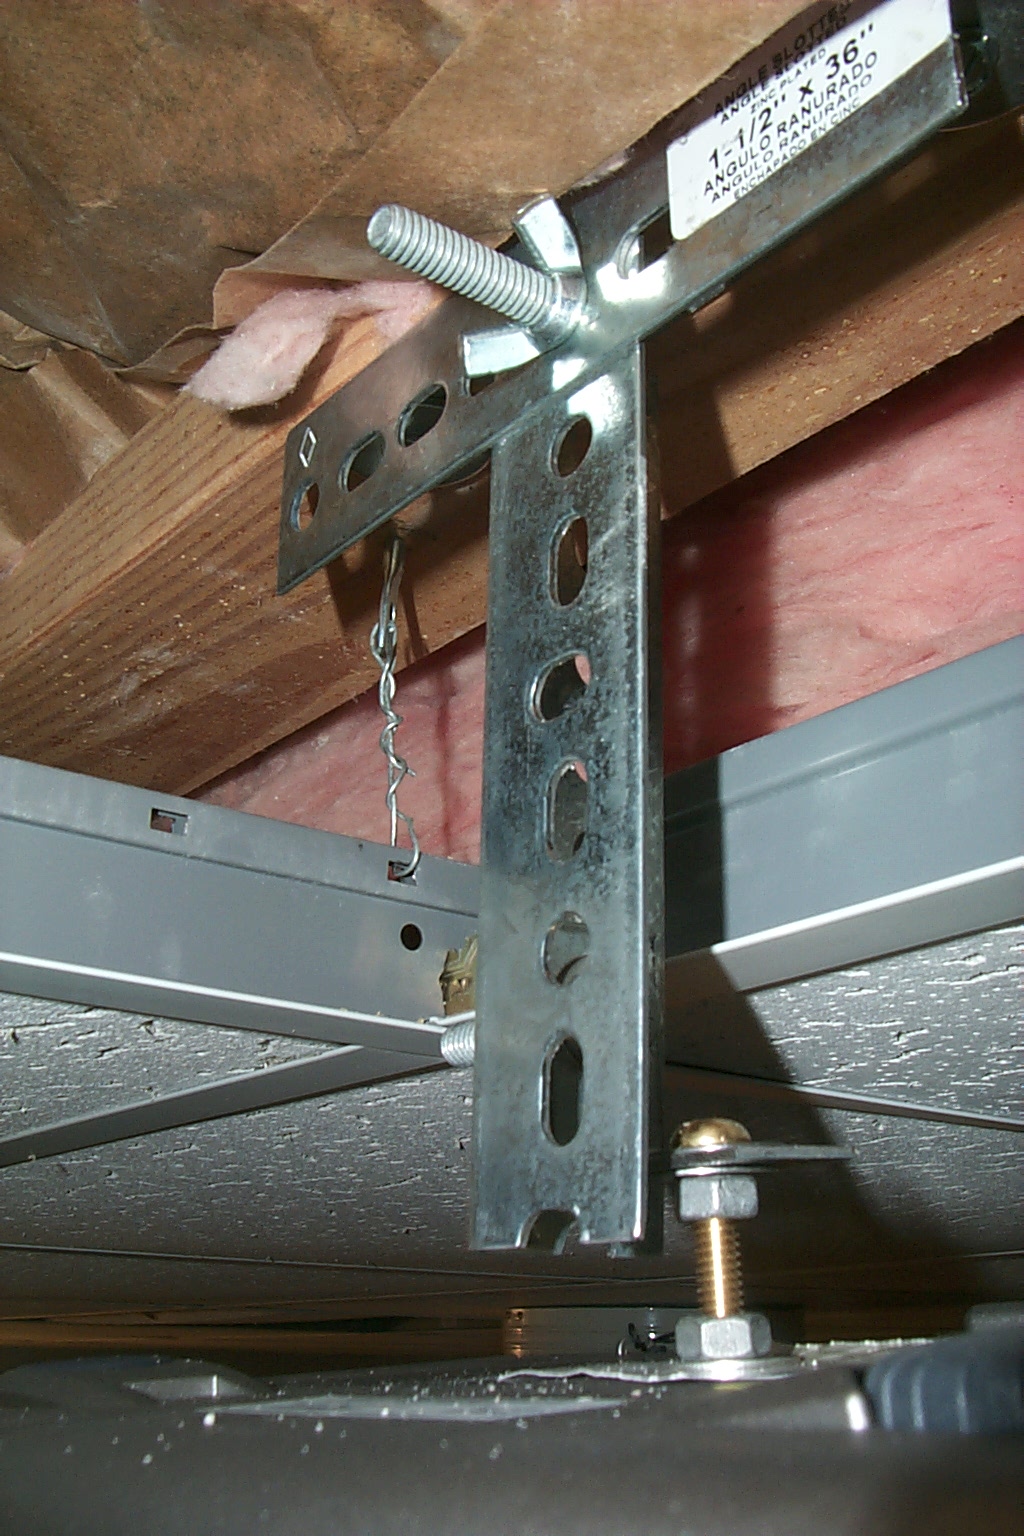
Piece 1: pre-drill some screw holes in the beam and horizontally mount a length of angle iron to the beam with some wood screws and washers.
Piece 2: bolt another piece of angle iron vertically to the first one using a bolt, a wing nut, and one or two washers
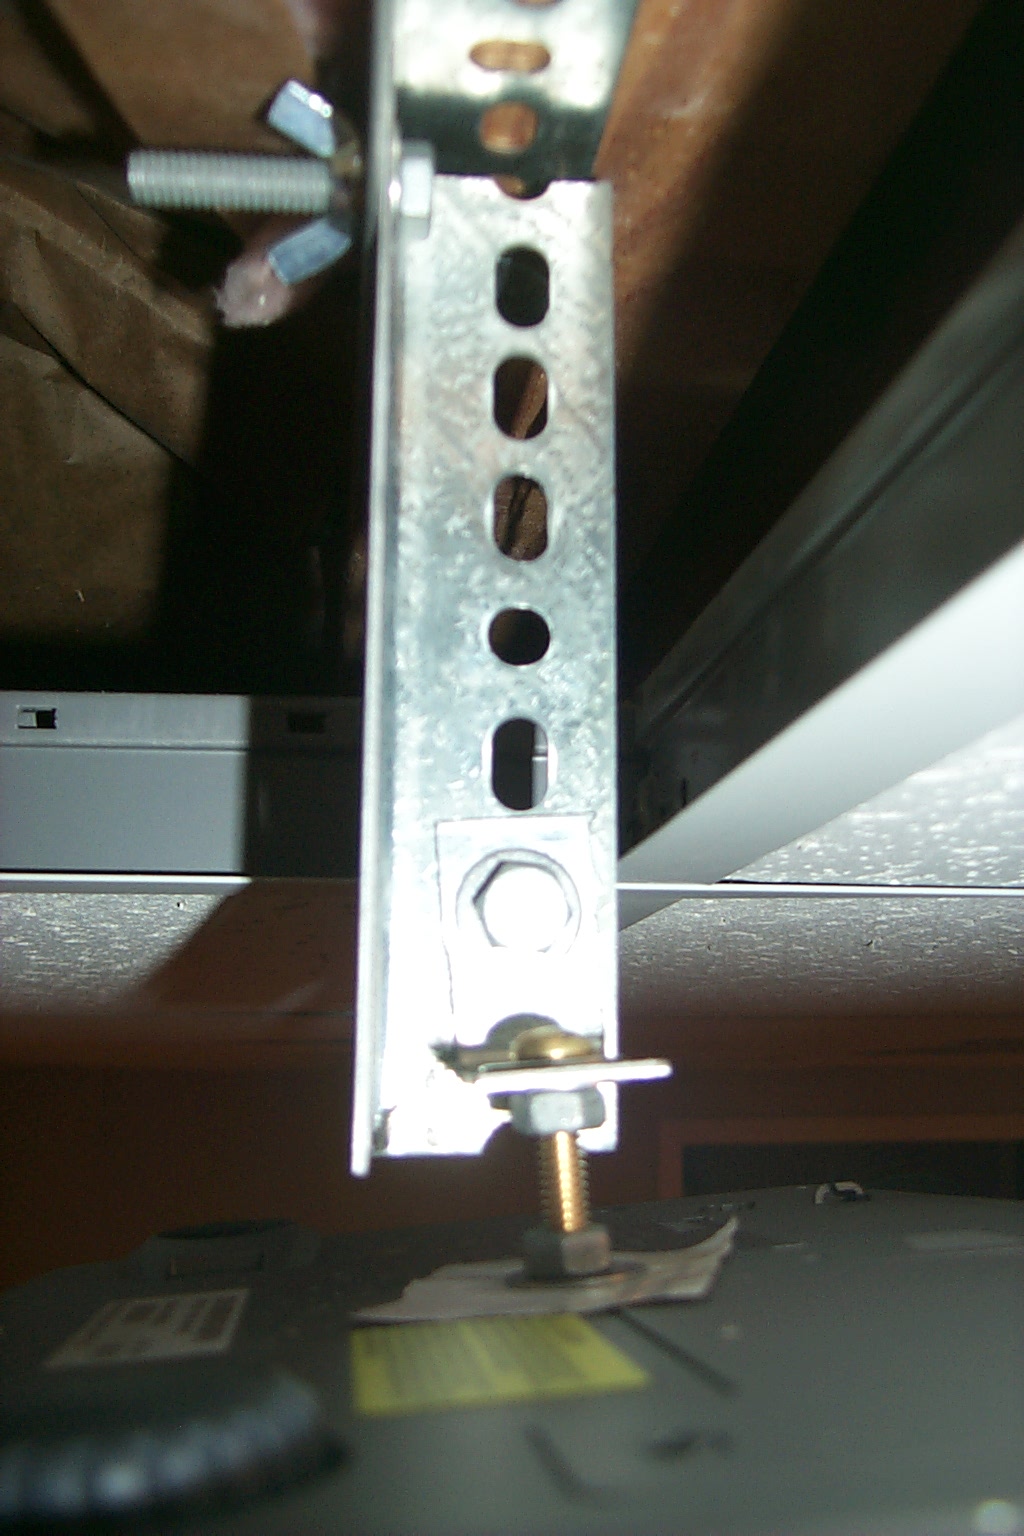
Piece 3: This is a really short piece, only big enough to contain one hole, and not one of the long holes either. Take the 1/4" bolt and thread it through a washer, piece 3, another washer, a nut, a second nut, a third washer, and then a piece of paper (to minimize abrasion of the projector). Screw the bolt into the projector a bit, but don't bottom out. Then tighten the nut against the washer and projector, but not too much. Then rotate piece 3 to the angle you prefer, and tighten the other nut against the washers and piece 3.
You can now attach Piece 3 to Piece 2 using another bolt/washer/wingnut combo.
Assuming you pick the correct sides for the bolt connections you have 3 degrees of freedom to play with, which enables you to point the projector anywhere. Just make sure you don't put the two wing-nut bolts through the same face of piece 2 and you'll be fine. You'll also be happiest if you make the joint between 2 and 3 be the Pitch adjustment on the projector.
Remember that you have two choices on which side of the iron to bolt the next piece, but I found that keeping it all "inside" the angle iron allowed gravity to keep things lined up.
The projector should be able to project an un-keystoned image if you put the top edge of the image near the ceiling. I bet lots of "desktop" projectors share this design. Of course, you'll have to go into the 2300MP's menu and configure it for "front projection/ceiling mount", otherwise you'll be viewing all your DVDs upside-down.
| * Somebody explain to me why an optical cable needs "gold-plated connectors". I swear that's what I saw on the shelf at Fry's. |
I have soldered up a cable. The first time I soldered it, it didn't work, so I swapped the RX and TX wires. That made it work for my laptop, but it wouldn't work for any other computer.
I experimented with the timing of the control messages on the serial port. You can't send any leading filler bytes. The bytes of the control message must come one after another with no delay.
Eventually I broke down and bought an LED serial troubleshooter (simple device with LEDs that tells you when the lines are high).
The diagram in the manual doesn't say whether it is of the socket on the projector, or of the male connector on the cable. So I just twisted the wires together and soldered them both onto the same serial pin, making the connector work for either interpretation.
Except that didn't work. The extra connections were interfering with most computers' ability to signal the projector. When I used a DB25 patch connector and a second PS2 cord, I was able to determine that the diagram in the manual is of the socket on the projector. I then cut the extraneous connections and the cable worked for the USB serial adapter as well as my MythTV box when I got the cable home.
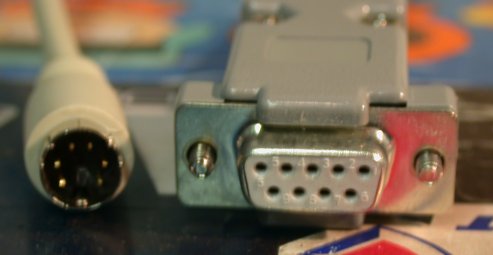
Dig this SVG of the pin connections. Both diagrams are looking into the connectors on the cable. You are gazing into the pins of the male PS2 connector and the holes of the female DB9.
Ingredients:
Find the end of the PS/2 cable with a male plug. Cut off the other end. Strip away some of the outer sheath, and then strip a little insulation from each of the individual wires. Use the continuity tester to figure out which pins are connected to which wires. Solder those wires to the DB9 connector according to the diagram above.
Warning: soldering irons are hot! Anything hot enough to melt metal, even crappy solder, is hot enough to burn a hole in my, and probably your, hand (maybe I'll upload a picture of it).
I wrote Linux software which can transmit commands to the 2300MP.
I have found that the commands are not reliable. Sometimes they just get dropped, and I have never found out why.
If you run the software with no command you get the help message.
$ 2300mp-cmd
Usage: 2300mp-cmd [ -s serial_device ] command
  Where command is one of
        power
        menu
        up
        down
        left
        right
        resync
        source
        volume+
        volume-
        mute
        freeze
        hide
        mode
        keystone+
        keystone-
        aspect